


Since it is Outerwear Month at Stitch, both Mary and Valerie decided to tackle the Jasika Blazer from Closet Core patterns together! They helped each other with the muslin fitting process and had a lot of thoughts, so read on to find out what changes they plan to make before cutting into their final fabrics.
Valerie:
Earlier in the fall Mary and I were discussing the Jasika blazer as a must for the fall/winter sewing queue, so we decided to work on ours together during November!
The first step was to get a muslin sewn up, an absolutely necessary step for a garment with so much tailoring.
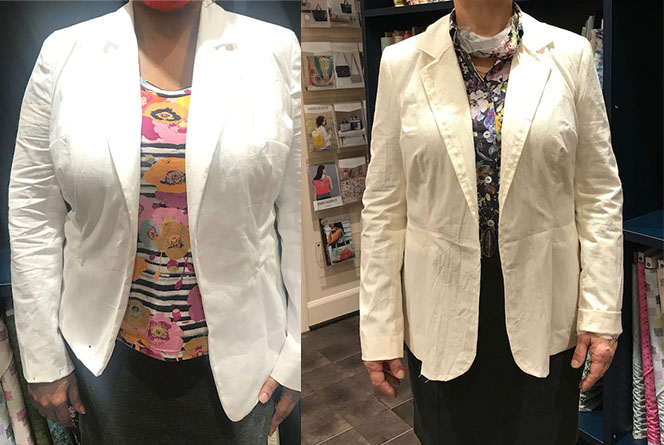
I sewed the size 14 (with the D cup expansion), and everything came together very easily. The instructions are very clear, and the multitude of marks and notches make the construction steps make perfect sense.
I tried the muslin on with the shoulder pads in place, and the shoulders and back and bust line fit very nicely. However, the darts are slightly too high, so I will lower the side dart by about an inch and shorten the front dart by the same amount.

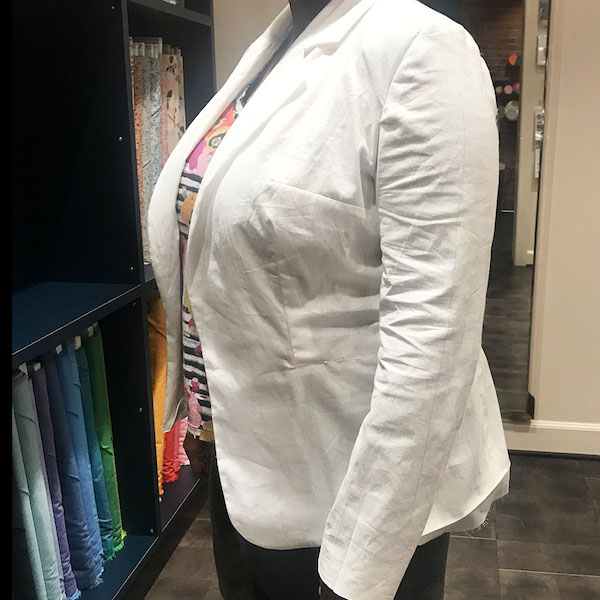
The next thing I noticed was an issue with the sleeves. They look great if I stand still without moving, but if I want to move my arms while wearing my blazer, I’ll need a little bit more ease! I’ll add about 2” in the bicep to allow for free movement.
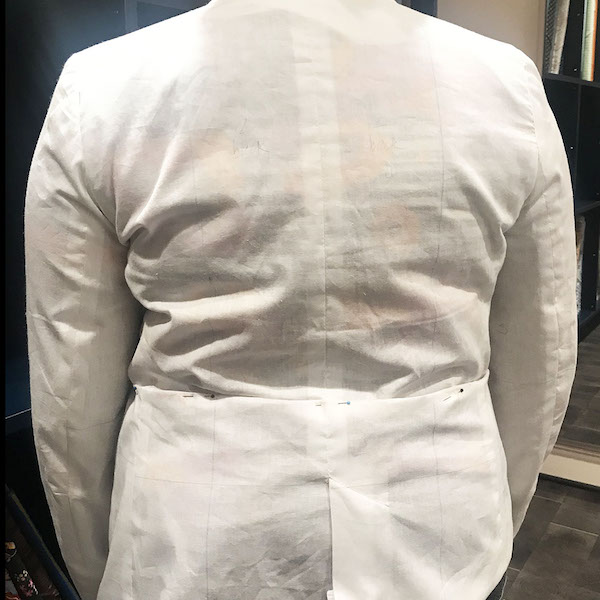
Next was the back – Mary helped me pin out the excess in the back waist to accommodate my sway back/short waist. I figured I would need to do this, which is why I was careful to mark the waistline on the outside of my muslin pieces to make this adjustment easier. The wedge shape I’ll remove is about 5/8” in the center, grading out to zero at the side seams.
Then (and this was another adjustment I knew I would need) it was definitely too long. Luckily Mary was there again to help me pin up my sleeves about 5/8” and the jacket hem a full 3”!
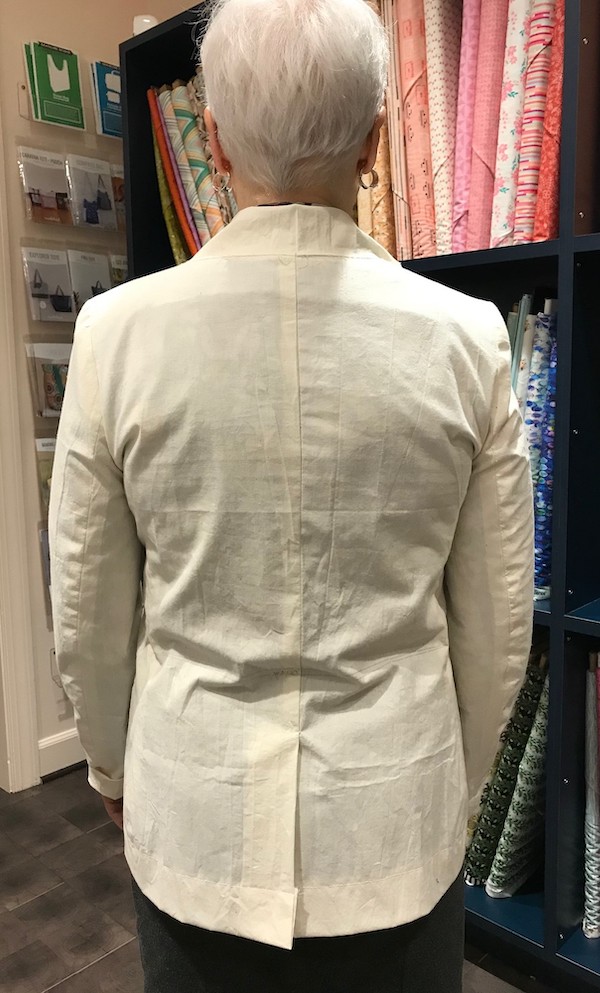
The final adjustment is to grade out to a 16 in the waist/hips, so that I’ll be able to button the finished jacket easily. Even though I probably won’t wear it that way, it will hang properly with a little bit more room in the waist.
Once I make all these changes to my pattern, I’ll probably do another quick muslin (without the collar or pockets) to make sure the changes turn out the way I like. Then onward to cutting into my beautiful dark purple wool I’ve been saving for a blazer!
Mary:
I have had an urge to make a blazer lately and November is a perfect time for a warm toasty jacket. What a versatile piece of clothing! It dresses everything up, makes everything look put together. Pop it on with jeans, pair it with a skirt or tailored trousers. The Jasika by Closet Core Patterns is a perfect pattern to dive in with. Besides step by step clearly written directions, Closet Core offers online support on fit plus an optional sew along.
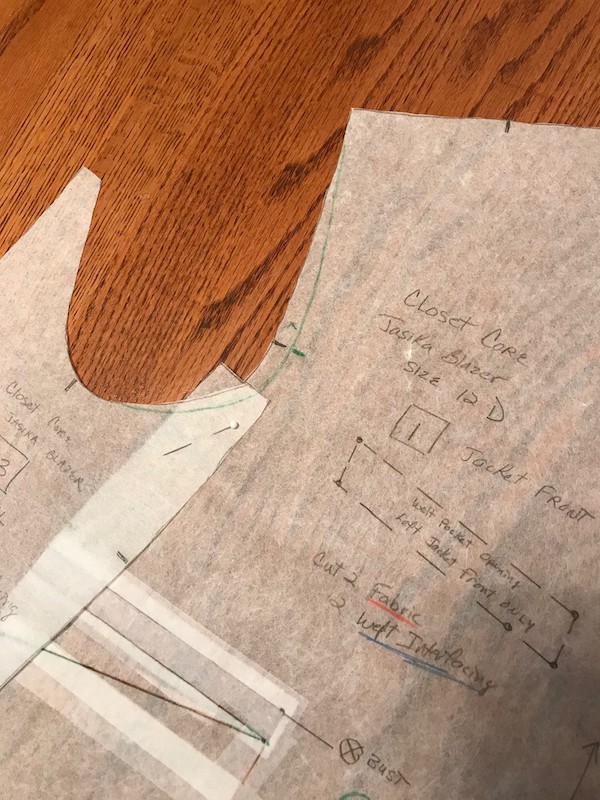
Making a jacket is a labor of love, what I call “slow sewing.” It takes time, attention to details, and care with fitting, a process both challenging and rewarding. Accurate measurements are crucial with any tailored garment, so fellow shop gal, Valerie, measured my upper bust, full bust, waist, hips, bicep, and arm length. Ordinarily, I would have to do a full bust adjustment, but Closet Core provides C and D bust cup front pattern pieces. I chose the size corresponding to my measurements.
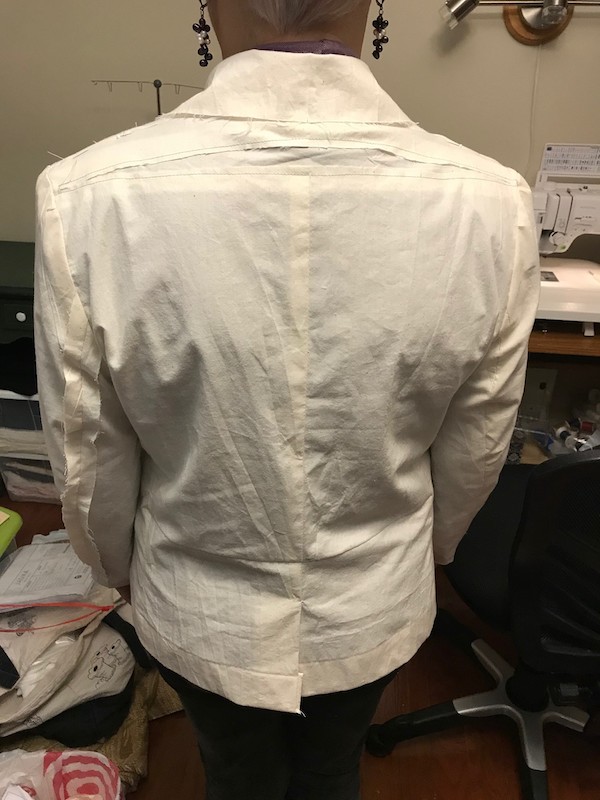
After I traced all the pattern pieces, I cut out my “First” muslin. Whenever you make a new pattern, make a muslin. My fabric is a beautiful, expensive wool tweed, so I want to address and correct any fitting issues before I cut my good fabric. I sewed up my first muslin and tried it on. As you can see by the pictures, I needed to do some tweaking.
When you assess the fit of a garment, start at the shoulders/neckline. Does the neck gap, are the shoulder seams aligned along the shoulder ridge, do the shoulder sleeve seams rest on the shoulder?
Look at the back of the garment. Is it too tight, too loose? Does the fabric puddle at the waistline? Does the vent gape? Are there drag lines across the back?
Check the front. Does the fabric lie smoothly across the upper chest? Are the bust darts in the correct place? Do they need to be moved, made shallower or deeper? Is the waist at the correct place? Can the garment be buttoned comfortably? Is the length a good proportion for you?
Do the sleeves fit? Are they too tight, too loose? There should be 1 ½ – 2” of ease in the sleeve at the bicep for movement. Is the length correct? The sleeve should hit the first knuckle of the thumb just below the wrist.
In looking at my muslin, I could see the back needed a slight sway back adjustment (1/2”), a slight round back adjustment and a forward shoulder adjustment. (Ah, the joys of a mature figure.)


The sleeves were very tight (I only had ½” ease), so I made a full bicep adjustment and added 1 ½”. I also shortened the sleeves by 1 ½”. The front upper chest area had excess fabric that bunched up, so I sewed a deeper seam in the front arm hole. I dropped the side dart by ½”, moved the waist dart toward center front by ½”.
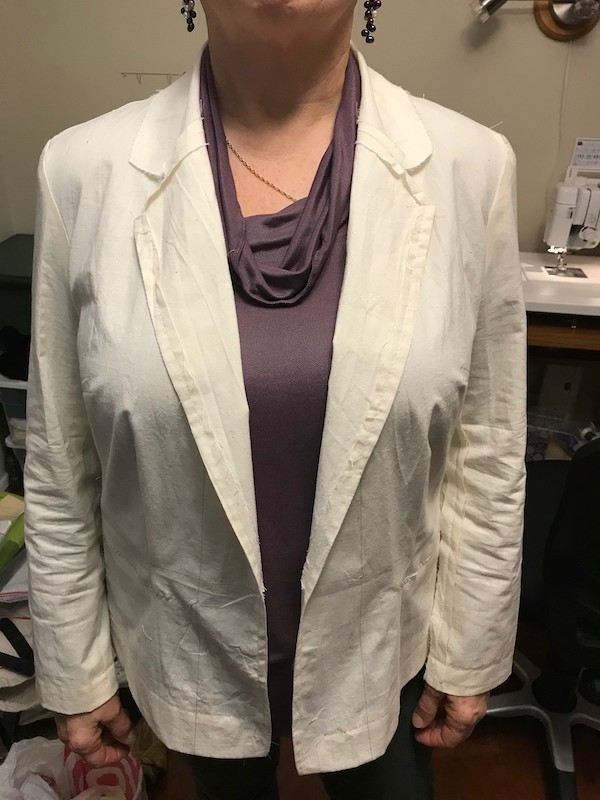
I also shortened the jacket length by 2”. Since I am only 5’3”, I felt the proportion was better for me.
All my alterations are transferred to the pattern pieces including pattern pieces for the lining, interfacing and facing pieces that are affected.
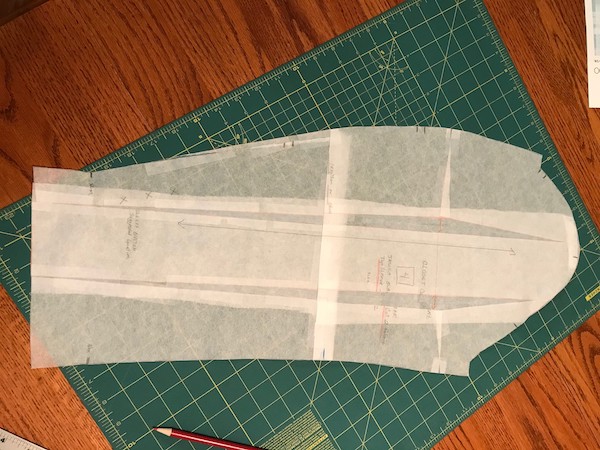
Bicep Adjustment
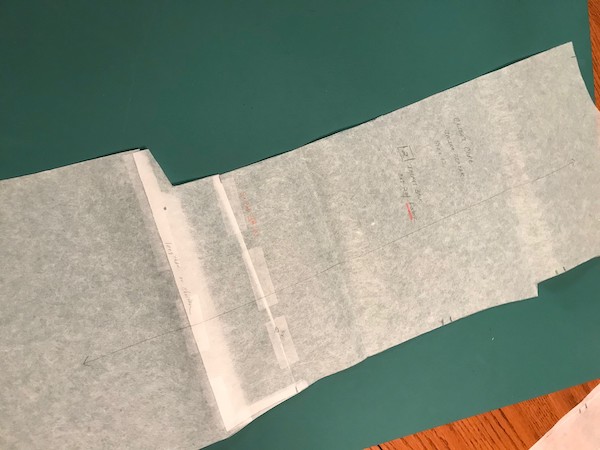
Swayback Adjustment and Shortened Length
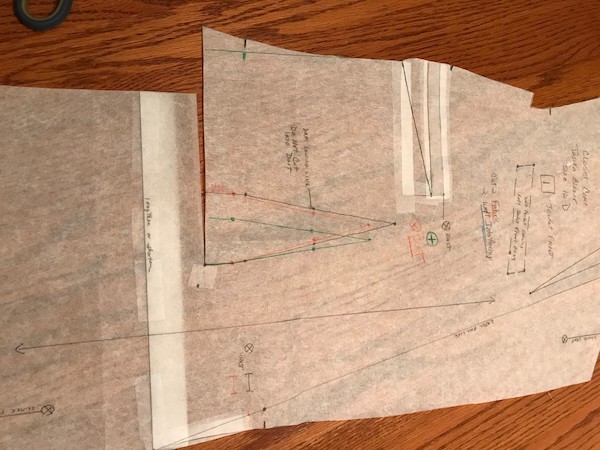
Dart Adjustments and Shortened Length
Scooped out front armhole
Heather of Closet Core recommends that all fabric be preshrunk before cutting. Don’t skip this step! Even dry cleaning can shrink a garment. I know!!!
Stitch Samples is a blog series that gives you a closer look at the samples made by members of our shop gang.


It’s very helpful to be walked through your thought process. The “why” for each adjustment can be easily seen in your photos, which makes the “how” make perfect sense. Nice teamwork, ladies! The finished blazers will be gorgeous, I’m sure.