


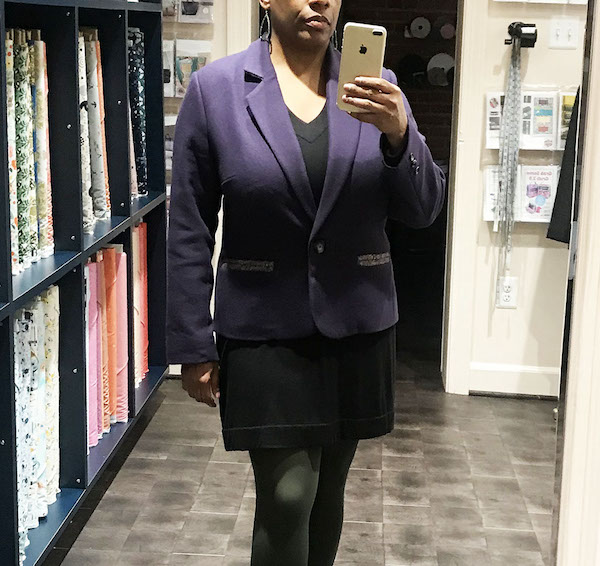
We are back with the final installment of the Jasika Blazer series! Valerie is sharing all about her final steps finishing up her glorious purple blazer, including adjusting the size of her welt pockets and sewing a beautiful notched collar. Read all about her final touches and check out her lovely detailed photos!
Pattern: Jasika Blazer from Closet Core Patterns
Project Status: jacket complete!
I was determined to take my time with this project, and not let all of my careful prep work go to waste. So I made sure to read through the instructions, and watch the Closet Core tutorial videos before each step. Good thing too, because otherwise I would have jumped in to sewing the darts first, when the actual first step is stitching in the stay tape at the lapel roll line!
I don’t think I’ve ever used more than three pins on a dart in my life, until this moment. Wool doesn’t stretch or slip like some other more traditionally “disobedient” fabrics, but its springiness can definitely lead to shifting; I wasn’t willing to risk it, so I wasn’t shy with the pins.
A word about pressing: you really shouldn’t skip pressing on any of your sewing projects, but it’s absolutely critical when working with wool! For every step, I used a press cloth (even on the inside; I don’t want my iron to stick to the interfacing), a hot steamy iron, and a clapper. My most important ironing tip is to use a lot of heat and steam, but not necessarily a lot of pressure; pressing too hard can “bruise” the wool, and you don’t need it to get a nice crease or a flat seam allowance. Let the heat and the clapper do that job for you.
(quick confession: I don’t have a clapper at home…I use a hardwood rolling pin I got from Ikea!).
The next step is the welt pockets, which I think is one of the two most challenging aspects of this blazer.
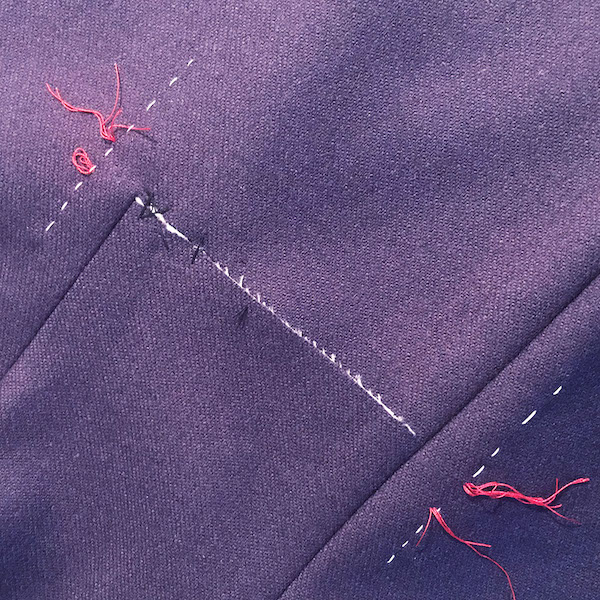
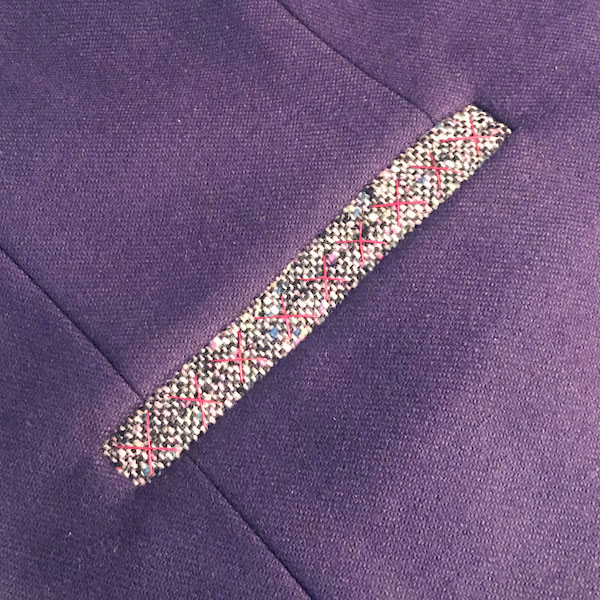
This pattern has a slash built in where the welt goes, which is nice, since making that cut into your garment can be more than a little nerve-wracking! I had thread-marked the dots at the ends of the welt, but decided to stitch in a line as well (the white thread you see above).
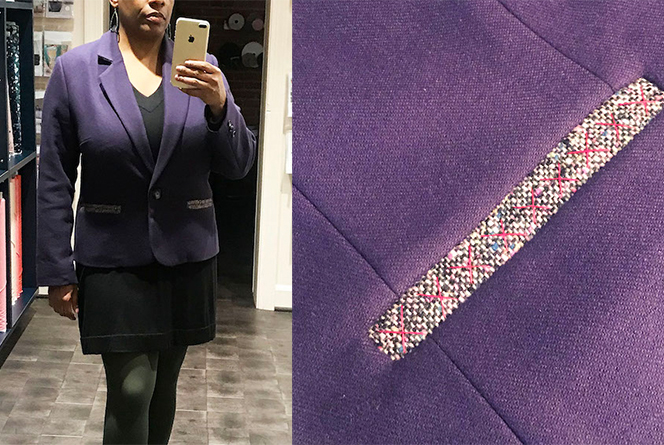
I wanted my finished welts to be a little bit bigger than the pattern called for (to show off my mottled wool), so I cut them a bit wider. Having those lines in place helped me see exactly where to start and stop stitching the welt (at 3/8” away from the pocket opening instead of 1/4”), so the extra step was worth it.
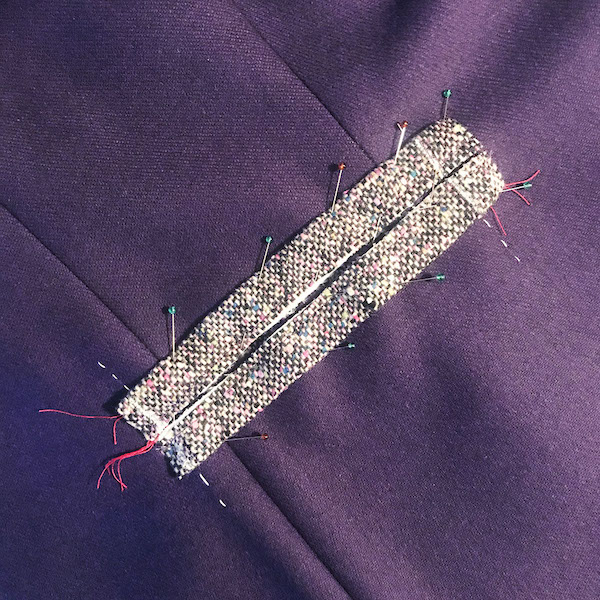
A welt pocket is not something where “close enough” isn’t going to cut it, so the careful marking was essential. The changes I made meant my finished welt was 3/4” wide instead of just a 1/2”, and I was very happy with how they turned out! I used more silk thread to quickly stitch them closed for the rest of the pocket and jacket construction.
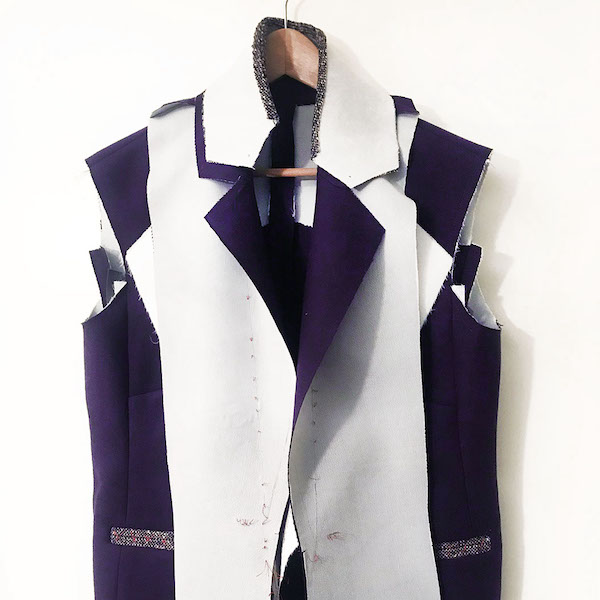
 The rest of the jacket shell construction was very straight forward, which brings me to the second most challenging aspect of the blazer: the notched collar.
I have sewn many welt pockets in my day so that part wasn’t scary. The notched collar was freaking me out a little bit though, so honestly I left the jacket in this state (waiting for the collar to come together) for a long time!
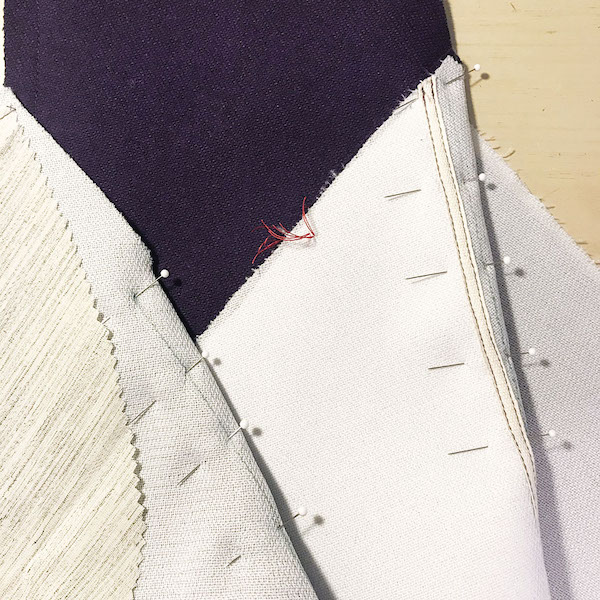
 After gathering my courage, I jumped in. I had done the notched collar on my first muslin, so I wasn’t going into this pattern completely blind, I had a little bit of practice. But of course, working with your fashion fabric is never exactly like working with the muslin. Just as I feared, my first attempt at the collar was not right; the inner corners and edges did not match up the way I knew they should, and there was the tiniest hole where the upper and under collar met the lapel.
After going back to the pattern, I realized that I had lost some of my marks, which made it difficult for me to match up the collar, undercollar, and neckline pieces perfectly. The lesson here: mark with both thread marks and ink/chalk marks at critical points, so if you lose one the other remains!
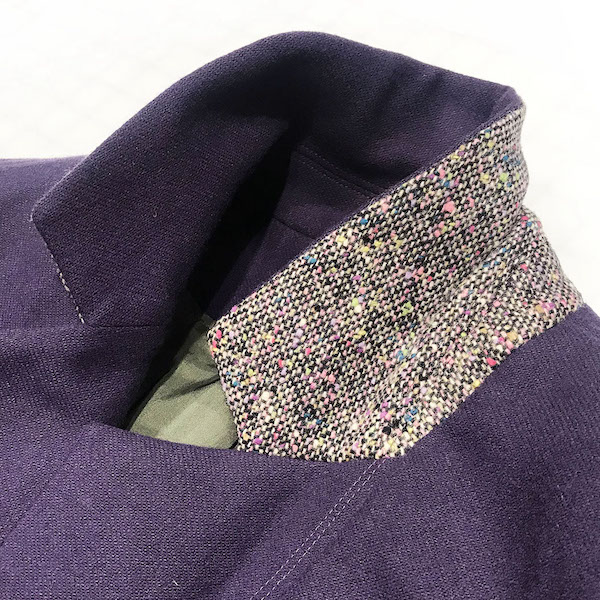 I had to do some seam ripping, re-marking, and re-sewing, and in the end it worked out! But this was definitely the hardest part of the whole process for me.
After all the collar drama, everything else seemed much simpler! Set in sleeves were not new to me, but I usually don’t bother basting them in first, as this pattern suggests. But with the weight of the wool, and the amount of ease in the cap of the shoulder, hand-basting first was absolutely worth it! Basting first guarantees a good fit, and makes the sewing SO much easier.
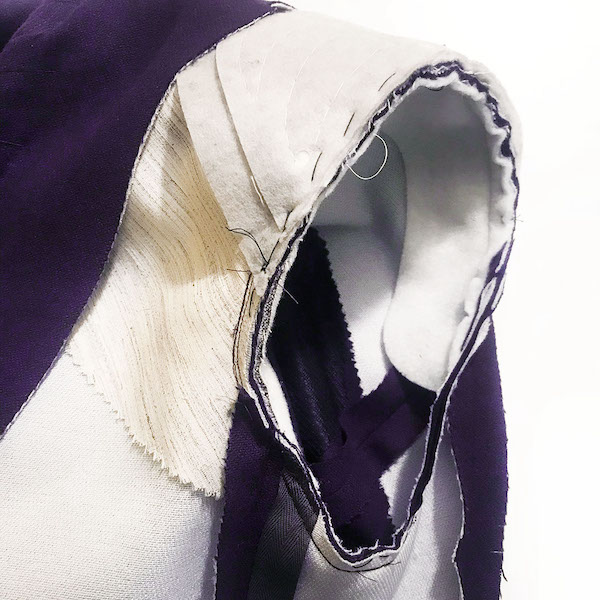 I had never worked with sleeve heads or shoulder pads before, and using the Closet Core tailoring kit made it super easy. The sleeve head went in by machine, and the shoulder pad with a simple hand-sewn running stitch.
At this point, I had completed the outer jacket and the lining, and was ready for the homestretch of putting everything together. But I’m glad I didn’t until I went button shopping!
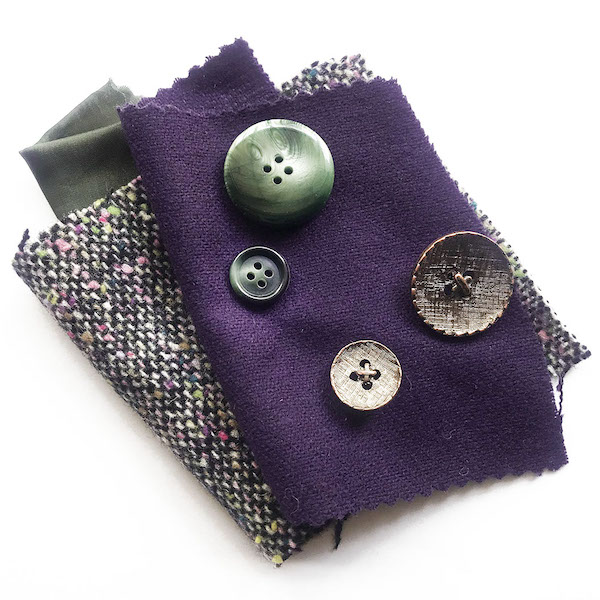
At first I was not going to put buttons on the sleeves, but when I found these lovely Italian glass buttons in the perfect shade of green, I changed my mind. I’m glad I didn’t have to sew through my lining to attach them (I’m saving the metallic buttons for another project).
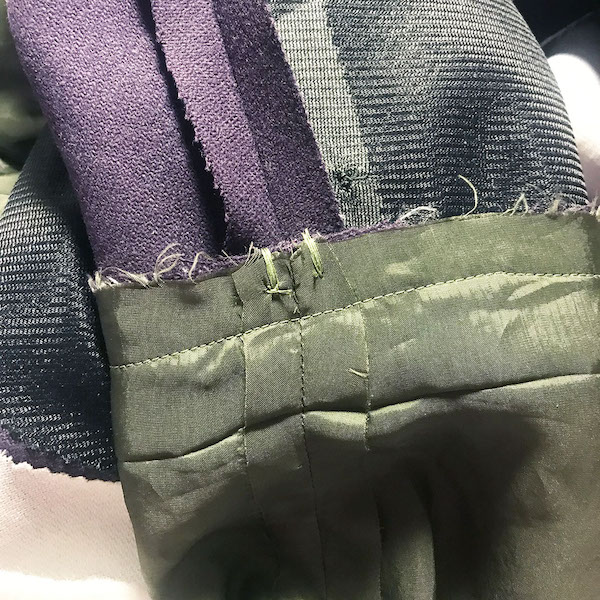
With the sleeve buttons sewn in place, it was time to bag the lining. Mary warned me of a possible issue with the seam where the front lining meets the front facing, so when I sewed the lining to the jacket along that seam, I (a) basted it first and (b) used a 3/8” seam allowance instead of a 5/8”. After trying it on, it turned out that was the exact right call, because it fit perfectly – no pulling or bagging anywhere.
However, something else went wonky with my lining…the lining just did not match the wool in the neckline or at the shoulders…it was way too big! All of the notches matched perfectly along the front, and then there was inexplicably about 2.5” extra (on both sides) right around the shoulders. (Sorry I don’t have a picture!)
The process of basting and then sewing that seam for real more or less fixed the problem (there is still a tiny tuck, and the shoulder seams do not match up at all), which leads me to believe it was an issue with my lining stretching. What I should have done to avoid this: stay stitch the entire neckline of the Bemberg lining before assembly! I made a note for myself in my directions for next time.
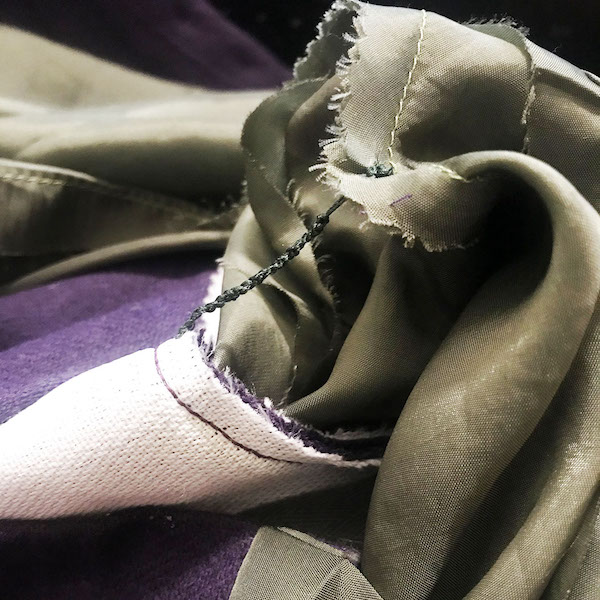
After bagging the lining, the only thing left was the finishing touches, like tacking the sleeve and hem seam allowances in place, and tacking the underarm sleeve seams together with a thread chain.
As always, the buttonhole and button comes last. I briefly entertained the idea of working the buttonhole by hand, as I knew I had silk buttonhole twist in my stash, but it turned out to be the wrong shade of purple.
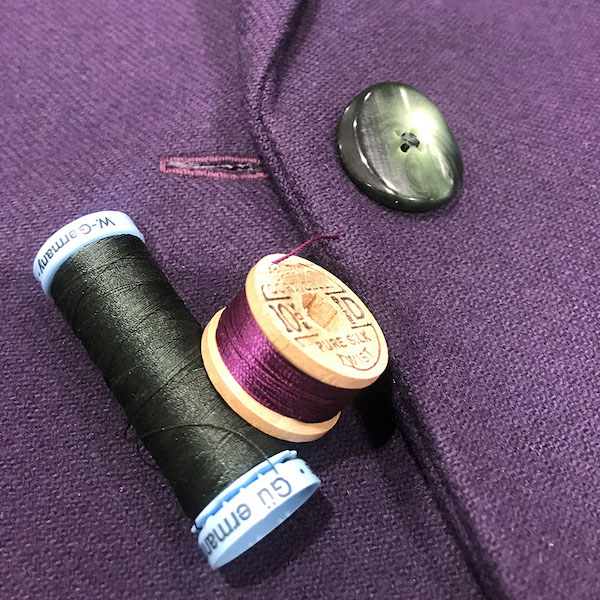
Luckily the automatic buttonhole stitches on my Brother are pretty reliable, so after making two perfect samples and the first one in the jacket failing (of course), I got it to work! I sewed the button on by hand with matching silk thread, and a flat plastic backing button to add stability.
I’m very happy with the finished project, and the weather has actually cooperated with me, as I’ve actually been able to wear it more than once, even though it’s already April!
The Jasika journey was a great one, and it turned out to be a perfect quarantine project – not sewing for a particular event meant I was forced to take my time and really enjoy the process.
Stitch Samples is a blog series that gives you a closer look at the samples made by members of our shop gang.
See the previous posts in this series here:
Stitch Samples :: Jasika Blazer :: Part I
Stitch Samples :: Jasika Blazer :: Part II


Love the finished blazer! And enjoyed the whole series. Hoping to one make my own Jasika. This series has definitely inspired me.
Amazing! Congrats!