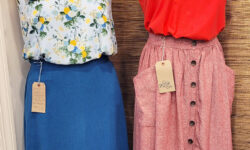
Mary is back with two delightful garments she made recently for her daughter and granddaughter.
Maker: Mary
Pattern Used:

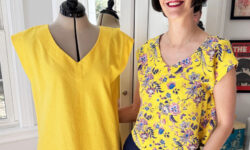
True Bias – RIO RINGER. A ringer style T-shirt and dress harkening back to the 60’s. View A is a fitted top that hits around the hip. View B is a semi-fitted dress ending just above the knee. Both views have contrasting ribbing around the crew neckline and short sleeves for that vintage look. This is a cute, SIMPLE AND QUICK make! Very satisfying!
(This is a PDF pattern, available in three size groups: 0 – 18, 14 – 30, and kids’ 2T – 10. If you don’t want to print at home and tape together, we offer large-format pattern printing services!)
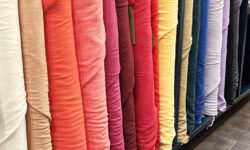
Fabric Used:
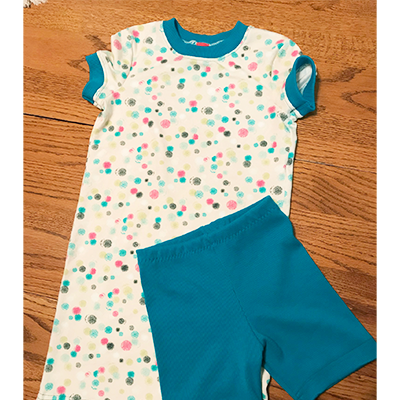
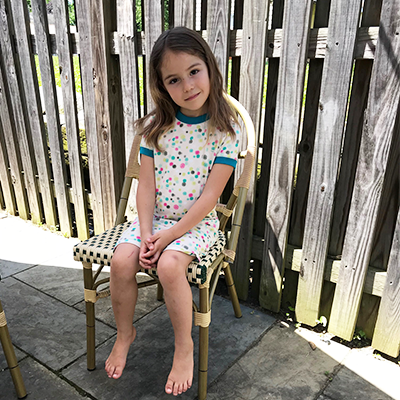
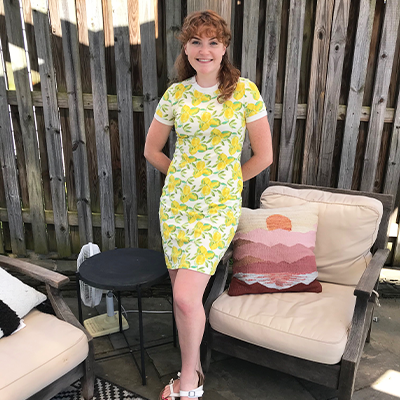
I used an Art Gallery Knit for both the adult and child size (yes there is a mini Rio!) and bamboo/cotton rib knit. My daughter chose the Yuma Lemons print for her dress – fruit printed fabric is so on trend right now and yellow matches her sunny personality. My granddaughter loves polka dots and does not love pink, so she chose the Aerosol Stipple print.
(Click through to see more of our Art Gallery cotton knits and rib knits.)
Did you make a muslin? Did you make any alterations to the pattern?
I did not make a muslin (I know, I am such a stickler for making muslins) because it is a knit, so there is a little forgiveness in the fit. The pattern is also so simple. I took my daughter and granddaughters measurements and compared them to the pattern measurements and the finished measurements. For my daughter, I cut one size for the shoulders/bust and graded out at the hips for a little more ease.
Did you learn any new techniques/skills?
I read through the instructions before I started. Sometimes I find a new way or a better way to do something. On scrap fabric I tried their method of attaching the ribbing. The idea is to have no raw edges, the ribbing fully encloses the seam. My machine would not cooperate at topstitching six layers of knit fabric. Everything kept shifting and stretching. Glad I tried it on scrap fabric, not my garment.
So I applied the ribbing using the tried and true method: I stitched the neckband together at the narrow seam and then folded it in half, right sides together, gave it a light press and pinned it to the neckline. Then I stitched around, stretching the ribbing slightly to make it fit, pressed the seams down and topstitched just under the ribbing with a twin needle to maintain stretch.

Do you have any tips for construction?
I used my serger to sew the whole dress together and my sewing machine with a twin needle for the topstitching and hemming. Because I only had to stitch over 4 layers at the neck and sleeve ribbing, my machine behaved beautifully. You could easily sew the whole dress together with your regular sewing machine and a narrow zig-zag stitch. I find a 2.0 wide x 2.0 length gives me a pretty stretchy seam. You need to keep as much stretch as possible to be able to get the neck opening over your head. You can also use a coverstitch for the hem and top stitching or your machine’s zig-zag stitch.
I chose to apply the ribbing to the sleeves while flat. Much easier and neater. I then attached the sleeves to the dress at the shoulders and sewed the side seams. I pressed the seam at the sleeve to one side and bar tacked it to the ribbing for a smooth finish (I have seen this in a lot of ready to wear).


Would you make it again?
Yes! The pattern was so easy and fun to make. Did I mention “FAST!”? It only took me a couple of hours to make two of them. This is a definite “make again” pattern. I like the idea of using a bright contrast for the neck and sleeve binding, or two contrasting solids – black/white rib, navy/yellow rib. Or a shirt! If you’re efficient, you could make a few in an afternoon.
Stitch Samples is a blog series that gives you a closer look at the samples made by members of our shop gang.