We are coming to the conclusion of the Jasika Blazer series, and today Mary is sharing her final steps and her finished jacket! As always, she has excellent advice for stitching and pressing to give you beautiful finishes. Read all about it, and how she had one final “make it work” moment after the blazer was done!
We left off with the body of the Jasika Blazer sewn together. It is starting to look like something!
Now I am ready for the collar and lapels. I continued to follow the directions from the pattern and watch the “sew along” from Closet Core Patterns for additional tips. Both really help me see the next steps.
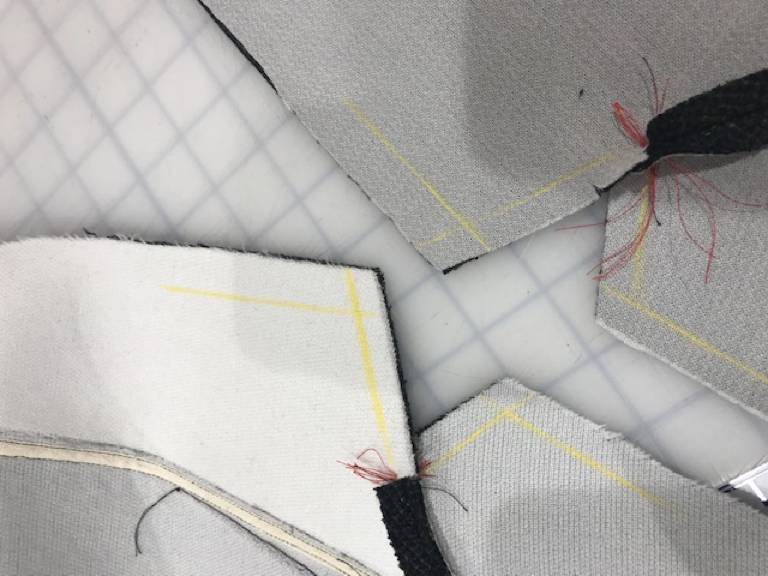
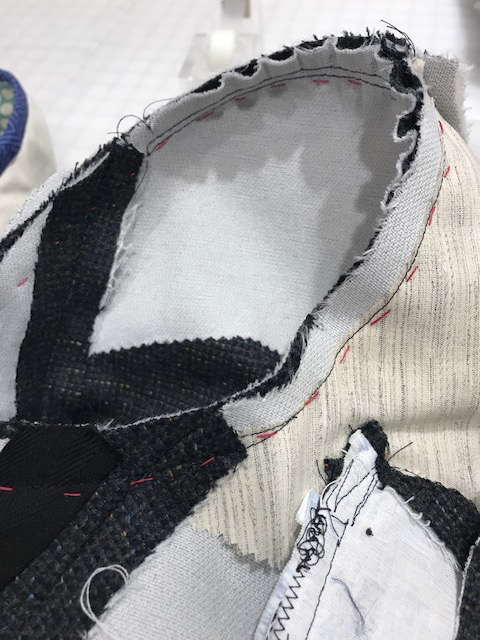
Accurate cutting and marking with tailor tacks make this go so much smoother. I prefer tailor tacks to chalk or even a frixion marker because I can see the match circle from both the wrong side and the right side of the fabric. Silk thread pulls out easily and completely from the tailor tacks when you are finished sewing.
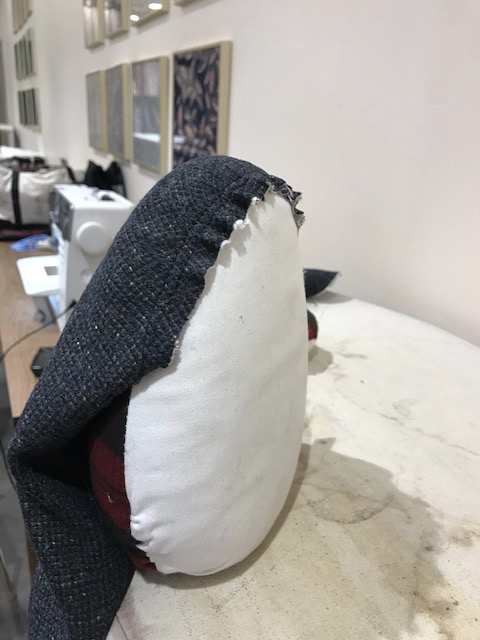
Pin and stitch precisely from circle to circle each step of the way, and use your pressing block for a good crisp crease on the collar and under collar. I pin my collar to my pressing ham and shape it gently with lots of steam from my iron. Let it cool before removing it.
For the lapels, I drew the seam allowances on the jacket facing and wrong side of the jacket. There are TWO different seam allowances – 5/8” and 3/8”. I also wanted to make sure I had a perfect line to follow for my lapel point. Then I started stitching at the circle, across the top of the lapel (3/8” seam). I shorten my stitches to 1.5 going into and coming out of the lapel point. Across the point I take 1-2 stitches at a 45*angle across the point. It sounds counter intuitive, but you get a better point and a stronger point this way.
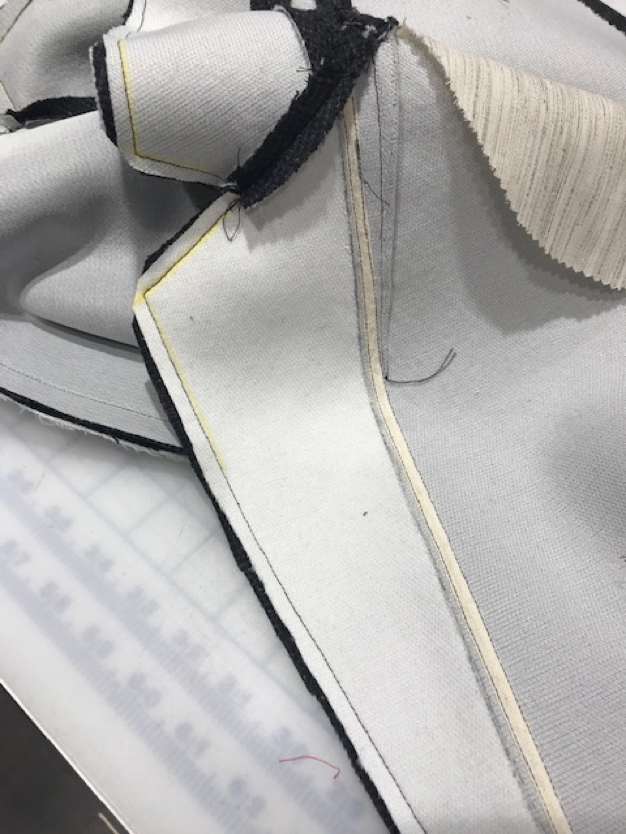
Pay special attention to grading these seam allowances; the grading will help the fabric roll the correct direction. Above the break you want the collar and jacket facing to roll outward, and below the break you want the jacket facing to roll inward. Press using lots of steam and your handy clapper!
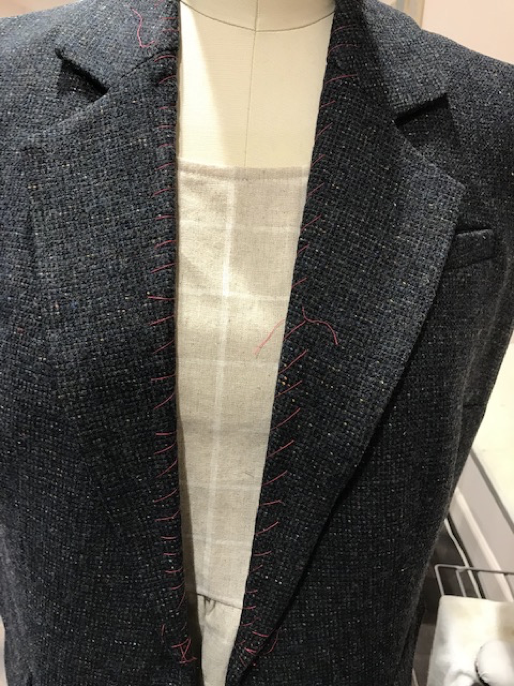
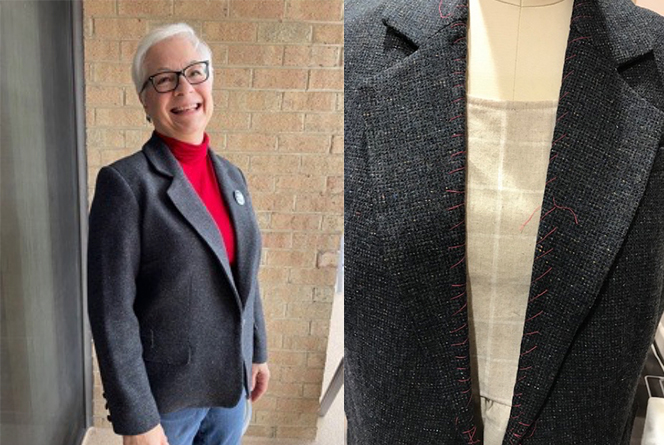
I did take the time to overcast the lapel with silk basting thread along the roll line and steam it with my iron. This is my “slow sew” and I want to get this right. The more I work on this blazer the more excited I get as I watch it come to life as a beautiful garment!
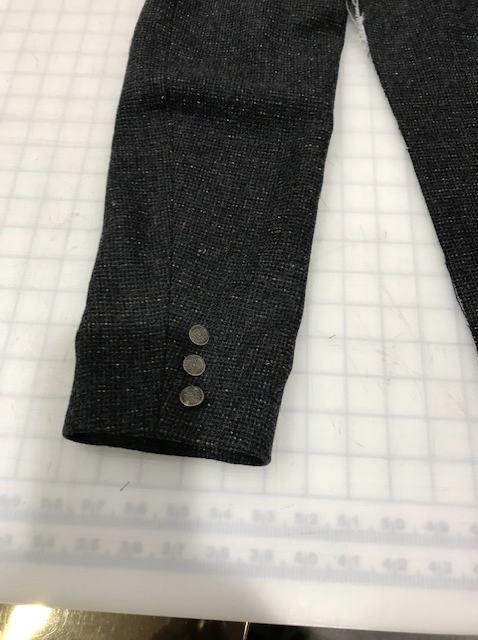
The Sleeves are pretty straight forward. I added the buttons at the bottom of the cuff. I have done alterations for years and I find replacing buttons in a closed sleeve irksome. I can’t easily fit my hands into the opening; it’s awkward. So I sewed the buttons along the first sewn seam while the sleeve was still flat. So much easier!
I shaped the sleeve heads with my pressing ham and then basted them into the jacket to ensure they were set in correctly. I tried the jacket on to make sure the sleeve fell nicely and then stitched it in.
The sleeve head and shoulder pads give the jacket a smooth tailored structure. I find shoulder pads help to balance my body shape; they give definition and emphasize my neckline. I’m not talking 1980’s Dynasty “linebacker” shoulders! Just a nice ½” bit of strength!
The lining went together easily even with my silky Bemberg rayon! I cut carefully on grain, remember?
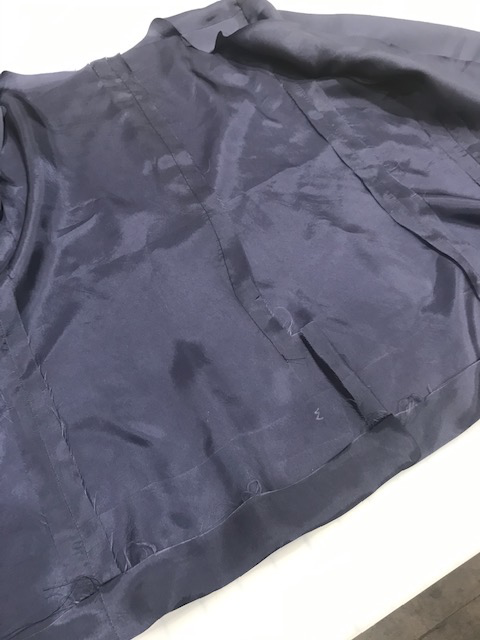
I like the bagged lining technique. It’s straight forward and relatively simple. The whole jacket gets pulled through the vent opening at the bottom back.
The area where I have to be careful is sewing the sleeve wrist seams. I pressed up the sleeve hem and the lining hem, pushed the lining through the sleeve as if to wear it, them pinned the sleeve hem to the lining hem at the button seam. (Make sure the right seams are lined up, or you’ll have a twisted sleeve.) Then I reach in the opening of the lining at the vent, grab the pinned sleeve and pull it through the opening. It will look really awkward. Keeping the right sides of the sleeve and lining fabric pinned together, match the raw edges and pin around the wrist. You will have to tunnel the lining into the sleeve. Stitch around the seam; tack the hem at the seam allowances and push the sleeve back through to the right side. Magic! And press!
I go back in and use a thread chain or piece of twill tape to secure the underarm seam of the jacket and lining together so the lining stays put when I take the jacket on or off.
Finally, I sew the vent neatly by hand. And another steamy press!
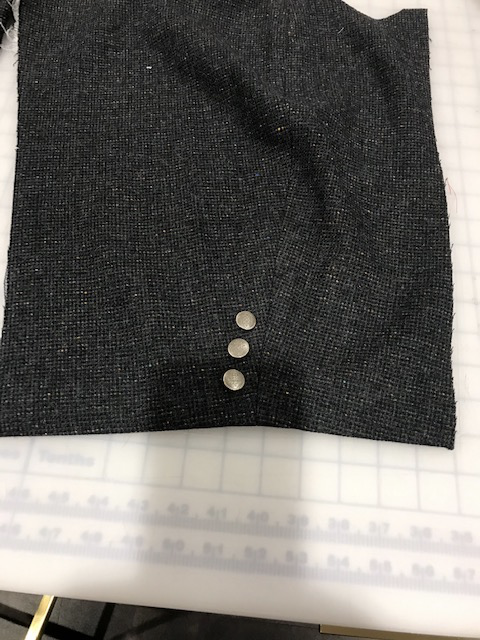
I used a corded machine buttonhole for strength and stability on my lovely tweed. I also sewed a clear button behind my button to protect the fabric from any strain.
After I tried on my jacket with the lining, I noticed puckering on both front shoulders at the small welt pocket level, and the sleeves felt like they were pulling in a weird way. I discovered the lining was ¾” too short across the upper shoulder; I measured the pattern jacket front, facing and front lining. On the D cup pattern pieces, it appears the facing and lining are each 3/8” too narrow from the bust point to the shoulder =3/4”. ARGH!!
I already graded the seams. SOOO, I improvised, opened up the sleeve seam from shoulder to underarm, and let out that seam as much as I could. IT WORKED! There is always a solution!!!
But check out the measurements if you are using the C or D cup sizes, or just don’t trim the seams until you’re sure it fits.
The Jacket is a BEAUTY! Classy and toasty warm!

See the previous posts in this series here:
Stitch Samples :: Jasika Blazer :: Part I