Mary and Valerie have both been working away on their Jasika Blazers (pattern from Closet Core Patterns) and are ready to give us another update. Valerie shares her process for pre-treating, cutting and marking all of her pattern pieces (there are a lot of them!), and Mary offers her tips for assembling beautiful welt pockets.
Valerie:
After making two muslins, I was finally ready to cut my fabric using my customized Jasika blazer pattern! But there’s a very important step before jumping into the cutting stage, and that’s pre-treating the fabric.
Just like any sewing project, you want to prepare your fabric before cutting, so that when you launder your final garment you’re not unpleasantly surprised by shrinking or fading.
But when using wool, you have the additional worry of mangling the fabric during the construction process – so much heat and steam is used to shape the fabric in making a jacket, it’s absolutely critical that you pre-shrink your wool as much as possible before cutting into it.
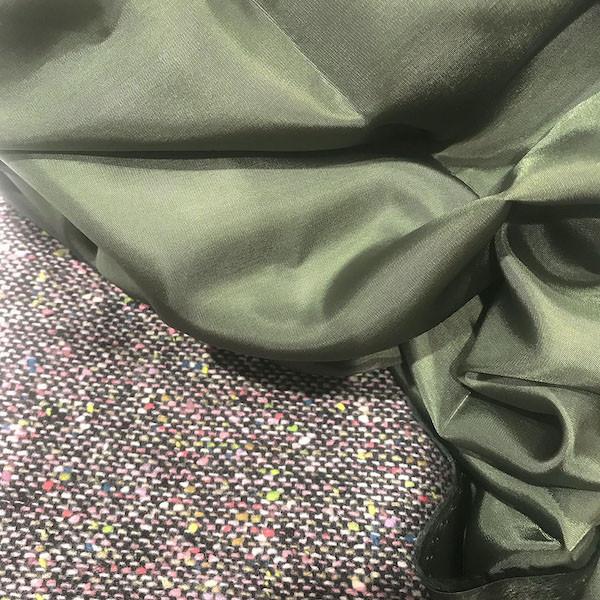
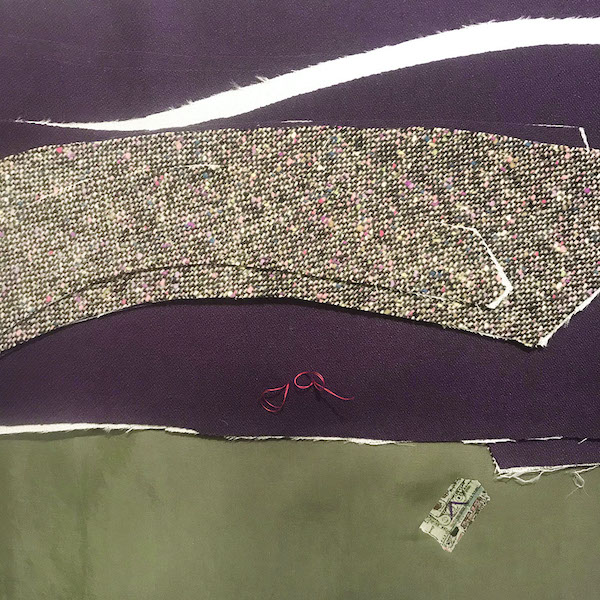
I used a hot, steamy iron to carefully press the purple wool that would become my jacket, plus the mottled wool I used for the under collar and the pocket welts. I also used a cotton press cloth so the iron wouldn’t touch the wool directly, and pressed the full yardage twice. The Bemberg rayon lining I machine washed and dried, and then also carefully pressed with a lot of heat and steam.
 Since I am using the tailoring kit from Closet Core, I did not have to pre-treat any of my interfacing, so once the fabric was ready I was ready to cut!
Paying attention to the grain is always important, but slip-ups can be particularly noticeable on a tailored garment like a blazer. So I was very careful when laying out my pattern pieces, even on the interfacing (yes, woven interfacing has a grain and therefore can be cut off-grain if you’re not careful!).
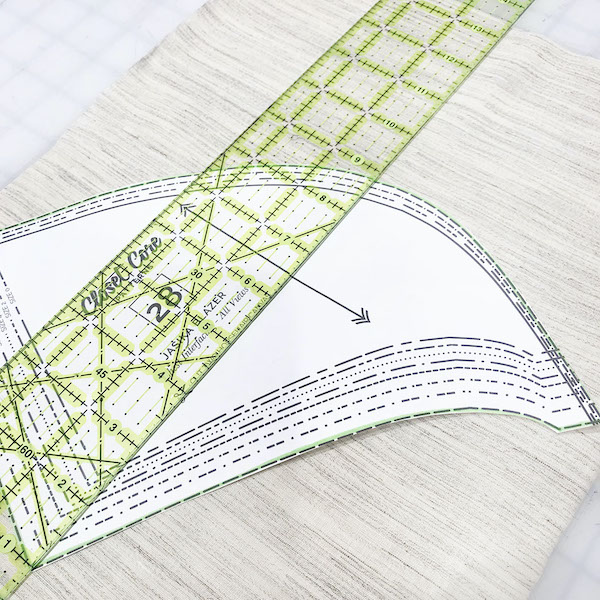 The Jasika has 13 body pieces, 20 interfacing pieces, and 8 lining pieces! With so many parts, it’s really important to stay organized and to go slowly. I dedicated a separate session to each cutting stage, so I wouldn’t rush through anything, get any pattern pieces mixed up, or forget any parts.
I started by cutting my purple wool for the blazer body. I snipped all the notches while cutting, but left the markings for after the interfacing was applied.
It’s worth it to double-check your fabric and interfacing against your paper pattern before applying the interfacing, just to make sure nothing has stretched out of shape or been cut off-grain.
 Once all the interfacing was cut, again I took my time to carefully fuse the pieces to my purple wool, double-checking and triple-checking that I was fusing to the wrong side (which I had marked using washi tape during the cutting stage). With solid-colored wool, it’s really easy to mix up the right and wrong side!
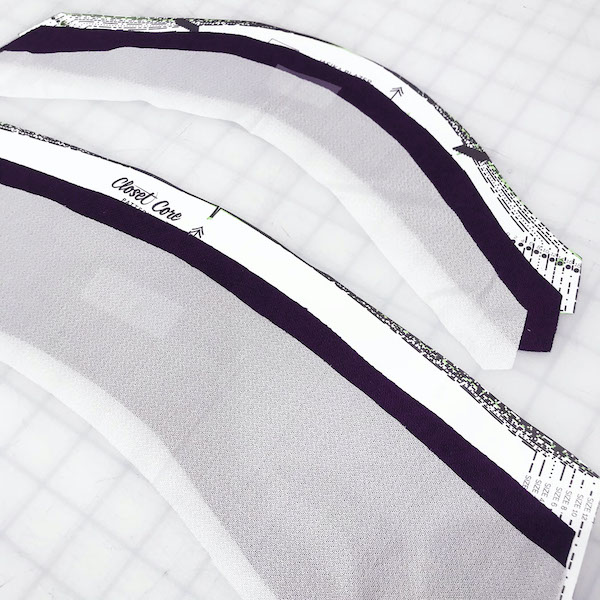
Next up was transferring the marks from the pattern to the fabric. I decided to use silk thread in a contrasting color to make tailor’s tacks for the dots. Hand sewing with silk thread is a dream; it won’t tangle as much as all-purpose thread, and most importantly, it won’t leave any marks in your fabric, no matter how long you leave your tacks in place!
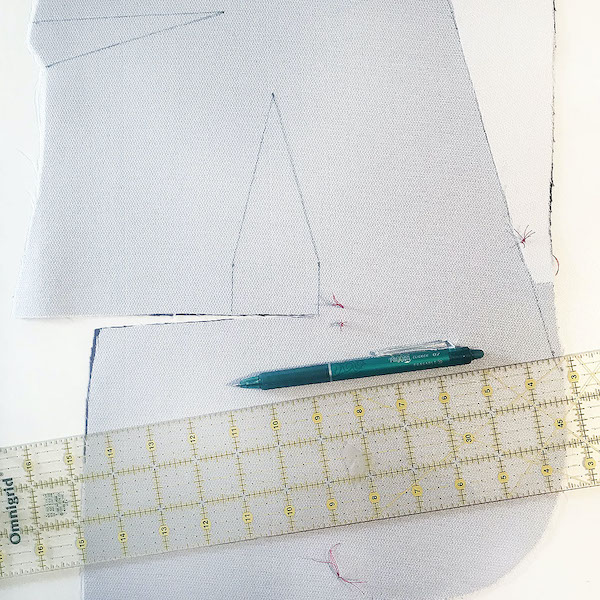
I used my Frixion pen to mark the darts, because they make such a sharp, clear line on the interfacing, and they iron away after pressing.
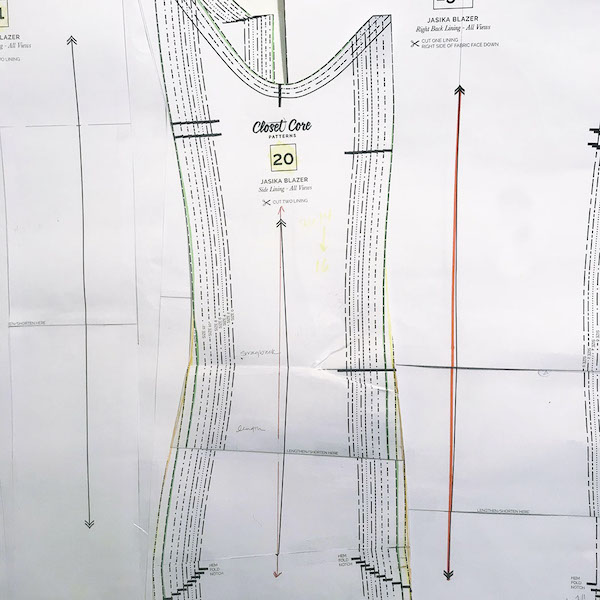
With my fashion fabric all squared away, it was time to turn my attention to cutting my lining fabric. But since I made only a partial muslin (no lining!), I first had to make sure all the changes I made to the jacket body pattern were replicated on the lining pieces…this took longer than I thought it would, but I’m glad I took the time to make it happen!
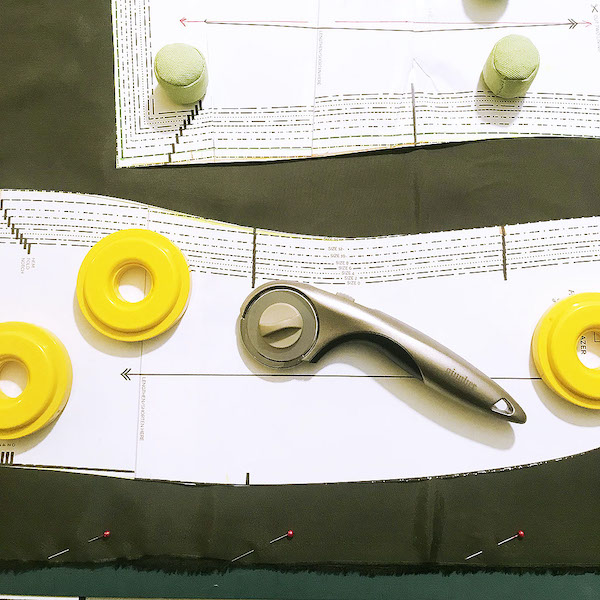
 Bemberg rayon is so pretty and so smooth, but it can be a bear to work with. Before laying out my revised pattern pieces, I pinned the selvedges together to keep the layers as still as possible.
I felt pretty confident accurately cutting my wool with scissors, but something as slippery as Bemberg definitely calls for a rotary cutter and a mat, with lots of heavy pattern weights!
 With all my fashion fabric and lining pieces cut, interfacing applied, notches, darts, and dots marked, plus the wrong side of my lining marked (with washi tape), I am now ready to actually start sewing!
Mary:
The actual sewing has begun! I like to read through all directions and underline/highlight anything that is a new skill or different from my usual method of doing things. I also make notes in the directions. I like to try to understand where I am going with a project.
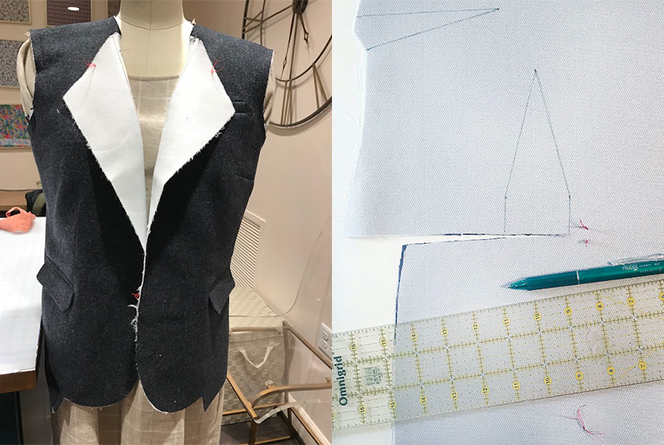
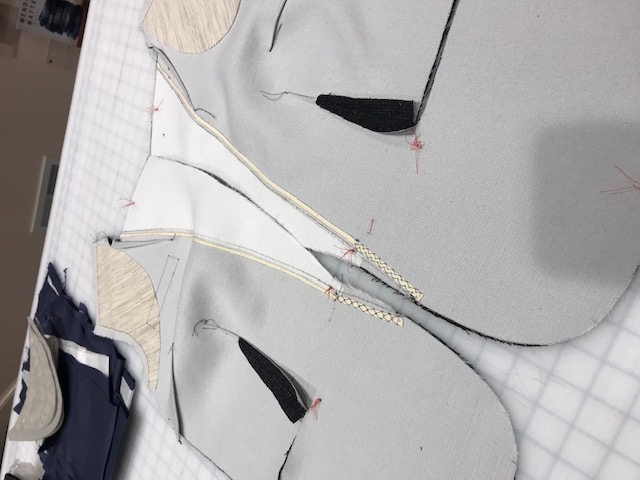
Step one is preparing the front of the jacket. The instructions for the pattern are excellent, especially in conjunction with the “Jasika Sew Along” on the Closet Core website. I tend to be a speed sewer (years of sewing costumes on a deadline!), but I really want to enjoy this process, so I am taking my time and learning things I don’t know or relearning things I forgot. Even tailoring with fusibles takes time and patience.
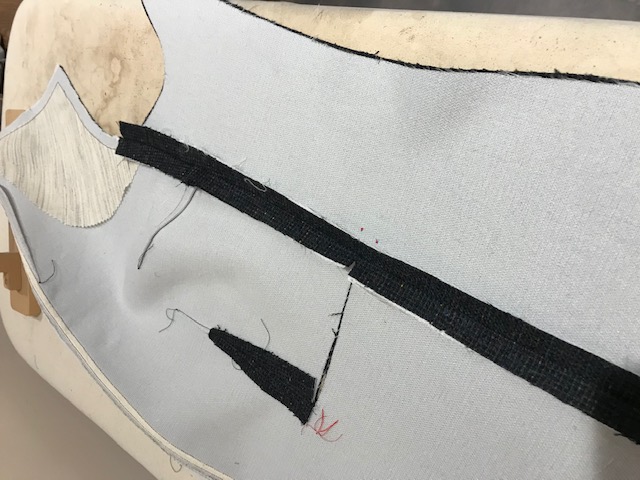
I draw in the dart legs by connecting the dots (tailor tacks) for an accurate guide for my darts. There are two darts on the jacket front – larger cup sizes will have an additional side dart. This side dart is not mentioned in the directions or the sew along as it was a later addition (yea!) After sewing the twill tape in place for the collar roll, and the shoulder, waist, and side dart I give the front a good press.
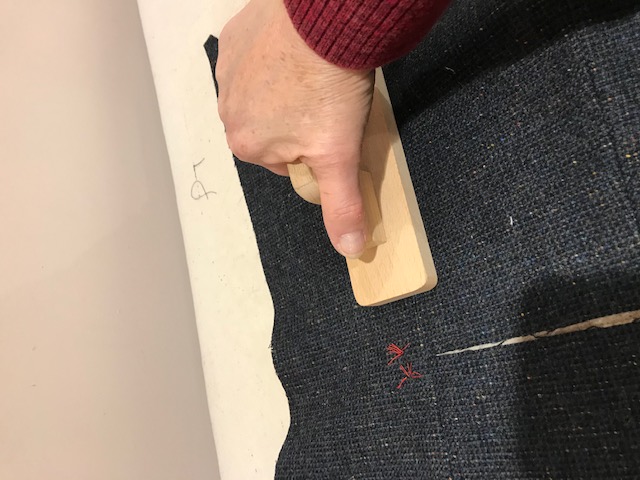
Pressing it so important when you are sewing for a professional look, but when you are tailoring a garment it is imperative. Use lots of steam, a press cloth, and a wooden clapper to set the creases. I also will use a piece of oak tag or card stock to tuck under the seams when I am pressing them open to keep the seams from showing on the front of the garment. A tailor ham and a seam roll are extremely helpful in giving the garment shaping on curved or rounded areas. Even after all the steam and heat my seams still wanted to bounce up a little, I chose to take the time and catch stitch them along the edges to keep them flat.
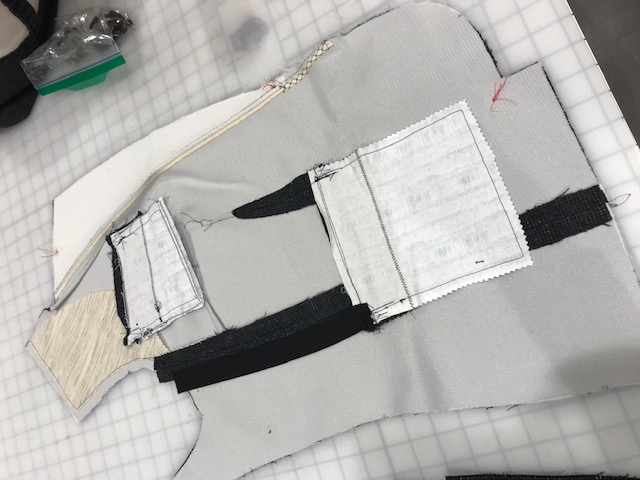
I chose to do the welted breast pocket. (And why not!) My wool is lovely speckled tweed, and the little extras elevate the rustic texture of the cloth. I marked everything with tailor tacks in bright red silk thread; it’s easier to pull out than polyester thread when I am done. Be precise when sewing welt pockets or bound buttonholes.
With any welt application you need to connect the dots on the right side or the fabric so you can see to place your welts. I have used chalk, a frixion pen, or fabric marker in the past. But my fabric is spongy and these wouldn’t show up clearly. So I connected the dots (drew my box) from the back on the interfacing and thread traced it with a tiny machine stitch in a matching thread. I can see it from the right side, but the stitching will not show when the welt is done. The stitching also gives a little added stability to my opening. I inadvertently sewed the welt in backwards, even after reading the directions and “thinking” I was matching the dots (sigh). So, I ripped it out and re-sewed it. No harm, just time!
Another good press and on to the side panel. Make sure the welt opening are tightly abutted to each other and flat, and they match evenly against the corresponding side panel notch. The dots on the side panels are the ends of the welts. Sew in place and give it another good press. (Do you notice a theme?)
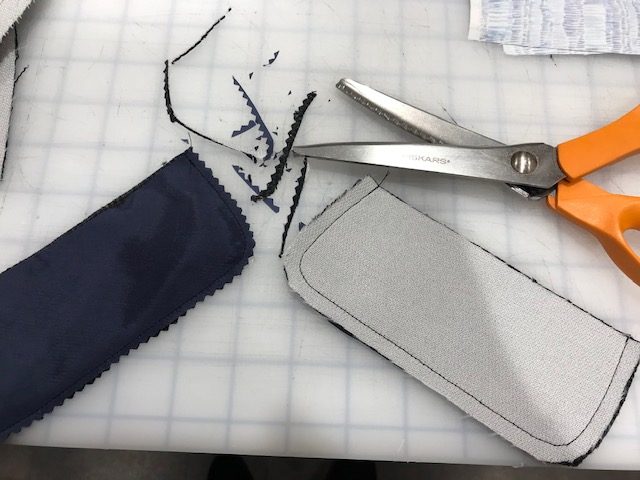
The welts are pretty narrow, but I didn’t have a problem with them. Heavy bulky fabric would be difficult. I followed the directions and was very careful with my measurements and placement. I also added the pocket flap, a nice touch. When grading or clipping around curves, I find pinking shears save me a lot of time.
Don’t neglect to put in the pocket stay. Because pockets break the plane of the fabric, they will tend to sag if they aren’t stabilized. I used a piece of 1” twill tape.
Sew your welts with a shorter stitch length – 1.5-2.0 – this gives it strength and stability. Your seams will only be ¼” wide after you slash your pocket opening.
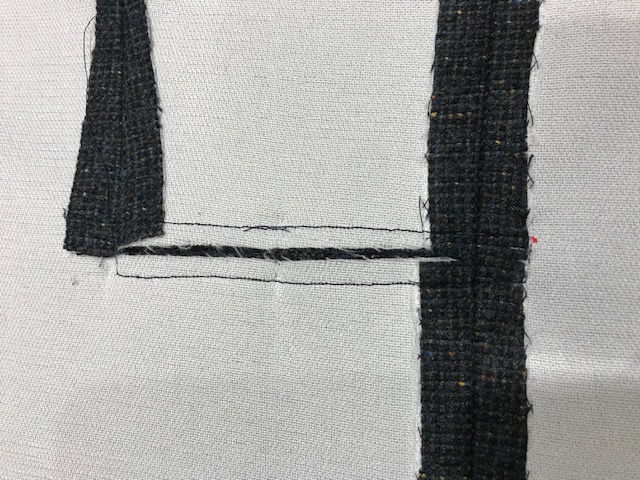
When you slash your pocket, you will clip small triangles into the corners of the welts (please see instructions or the sew along). These will be turned under to the back. Make sure there are no puckers. PRESS! As I finish my pockets, I stitch the triangles in place as close to the corner as I can and then go over them several more times to flatten them and keep them from pulling apart later.
Pockets finished and more PRESSING!!!

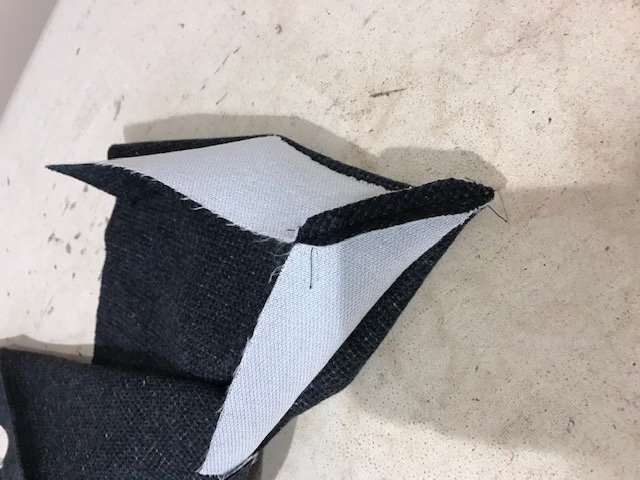
The back came together fairly easily after all the welting. The vent instructions are very clear and the mitered corner comes together beautifully. PRESS, PRESS, PRESS.
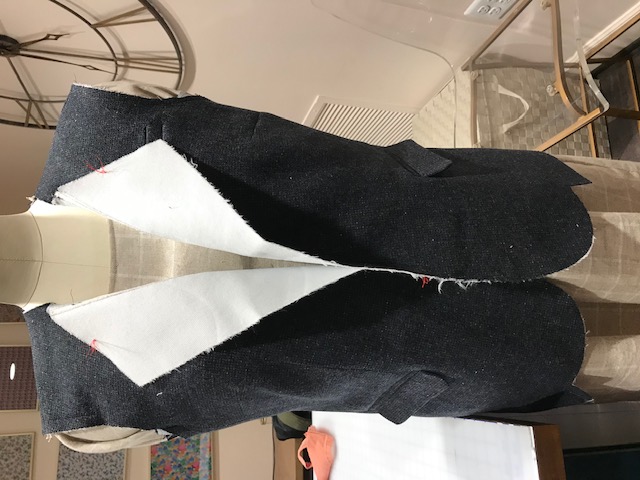
Sew your shoulder seams, easing the back into the front so it will cup the shoulders slightly. Sew over twill tape on the seam. This keeps it from stretching out over time. Press the seam to set the stitching, and then press the seam open over a pressing ham to retain the shape.
Well, that was a good day’s work! (Or a couple of days!)
See the previous posts in this series here: