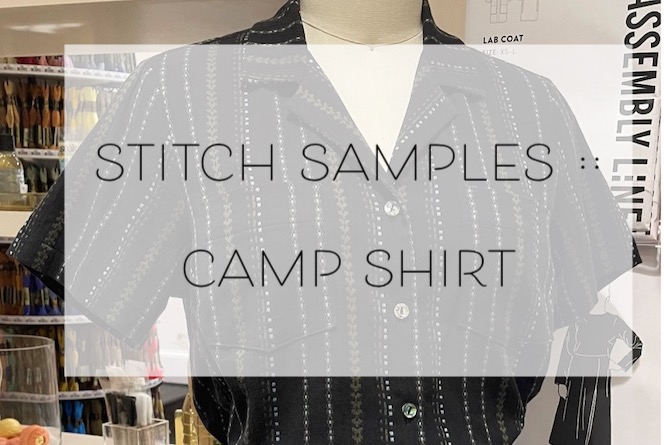
Having sewn this Camp Shirt pattern six times, it’s safe to say this pattern has reached “TNT” (Tried and True) status for Mary. Mary will be teaching a class making this shirt later in July – you can read all about that here! Pattern, fabric, and all notions and tools used for making this shirt are available at Stitch Sew Shop.
Maker: Mary
Pattern Used: Liesl & Co Camp Shirt and Dress
Description: Classic convertible collar blouse and dress. Details include yoke and optional pockets. The blouse (View A) includes a curved hem and long sleeves with a button cuff and tower placket The dress (View B) features a curved hem and cuffed short sleeves. This pattern includes separate pieces for A/B, C ad D cup sizes to help you get the perfect fit.
Fabrics: light to medium weight woven fabrics – linen, silk rayon, cotton shirting, lawn and voile

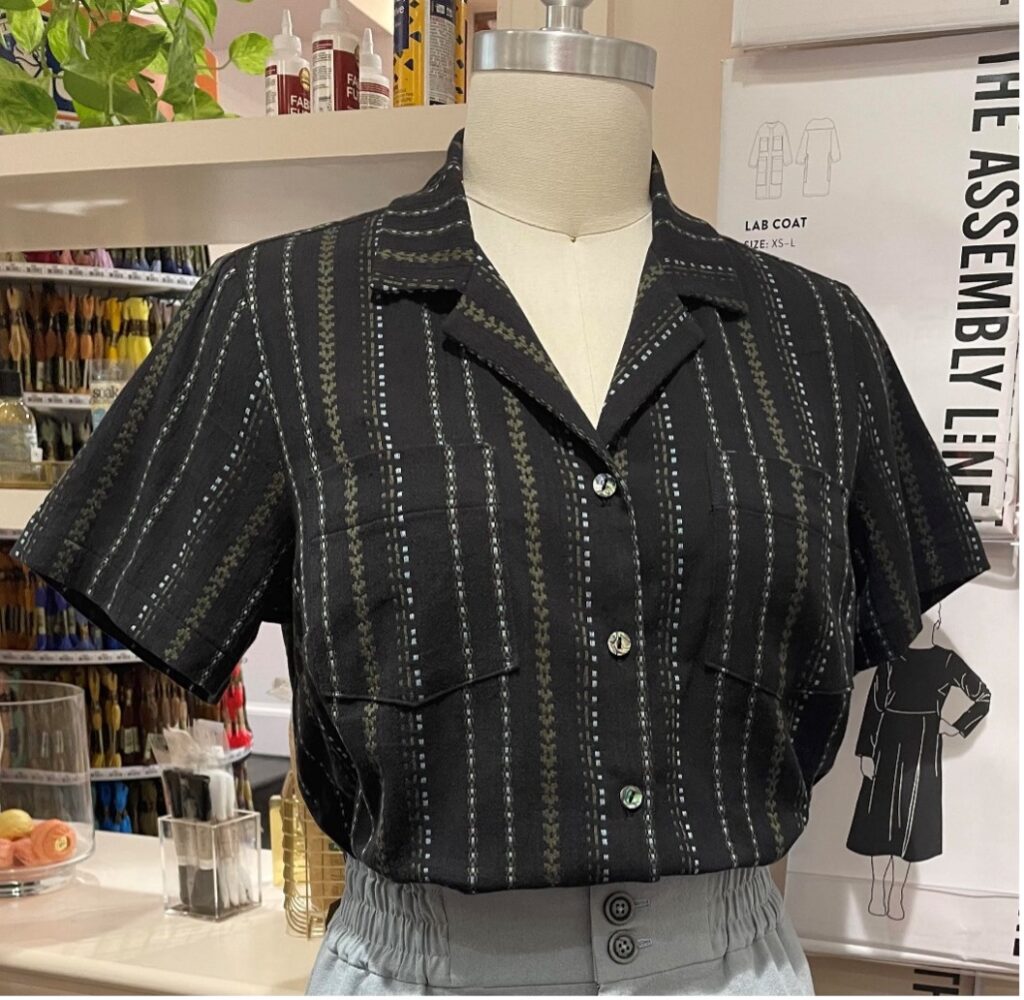
Fabric Used: Athena Gauze, black
Did you make any alterations to the pattern?
This is one of my TNT (tried ‘n true) patterns. I have made 6 thus far – two long sleeve shirts, one shirt dress, two pattern hacks (which I love!) and this gauze one. I can’t wait to wear it!
At this point, I have pretty much tweaked the fit to where I am happy with it, so I can confidently sew a blouse and know it will fit (I have made several muslins!). My alterations included: shortening the length by 2” (I am short, sigh), lowering the bust dart by 1”, round back and forward shoulder adjustment, and eliminating the sleeve cuff on the short sleeve. (ALWAYS make a muslin when you are using a new pattern. It may take a little longer, but you will not regret the effort.)
Do you have any tips for construction?
Construction is straight forward and explained well in the pattern directions; I find Liesl & Co. patterns beautifully drafted. There is often a different construction method that I am not familiar with or haven’t tried, and I learn a new skill or technique.
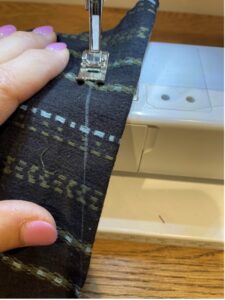
The order of construction will keep everything moving at a good pace. Fuse everything first, then staystitch the neckline before you start to sew anything. This keeps it from stretching as you handle the fabric.
Any tips or tricks you’d like to share?
I like to draw dart lines with Water Soluble Pencils on dark fabrics to make sewing easier. Then I sew the darts.
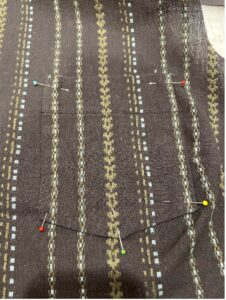
I cut the pockets to match the stripes on the front. The Hot Hemmer comes in handy to evenly press up the hems for the pocket so they are the same size and shape.
One of my favorite notions is the Fabric Glue Stick! I pin the pockets where I want them. I remove the pins on one side and dab the glue stick on the pocket side seam and press it onto the shirt. I do the other side and the bottom of the pocket the same way. No shifting or moving when I sew the pocket on and no pins to slow me down.
Any other notes?
The front, yoke, and back are sewn together using the burrito method – if this useful technique is new to you, join us for our upcoming class!
The collar and front facing create the convertible collar (a casual collar that looks wonderful in cotton or silk).
I sewed the sleeves in before the side seams – standard with most button up shirts. For the side seams I used French seams – sturdy and beautiful.
After the hem and the buttonholes, I sewed on lovely shell buttons that pick up the blue and green stripes in the fabric. What could be more perfect!
Would you make it again?
I love making shirts! There is satisfaction in creating something that is a little challenging AND fits well. If you want to dive into shirt making, a camp shirt is a great project. You can never have too many!

Stitch Samples is a blog series that gives you a closer look at the samples made by members of our shop gang.