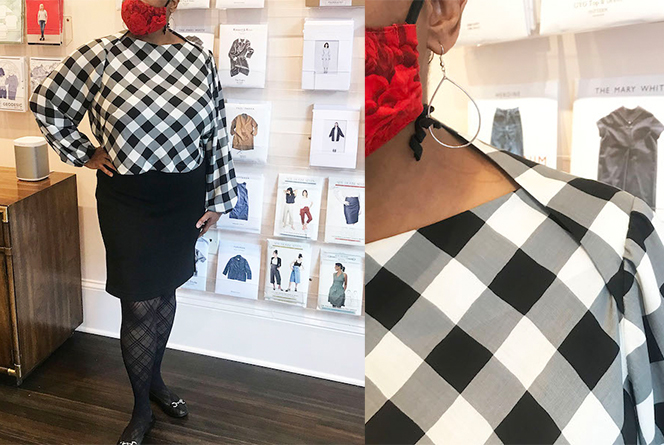
Today, Valerie is sharing her most recent shop sample: the Puff Shirt from The Assembly Line. Check out the way she cut her pieces to play with the plaid fabric she chose, and the tips she has for making those great elastic cuffs! Valerie has also been sharing her process (including the muslin-making) over on our Instagram account.
Maker: Valerie
Pattern Used:
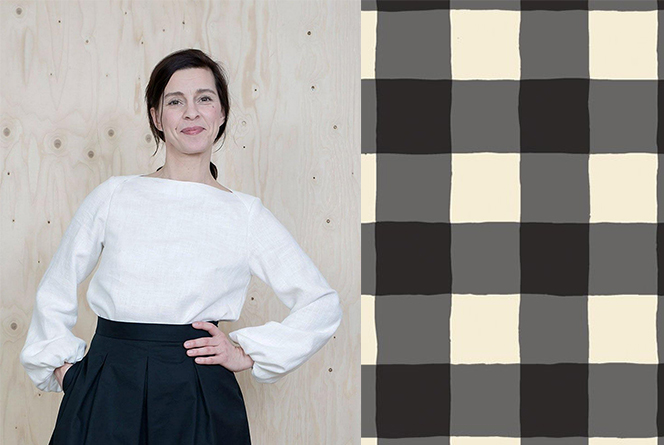
Puff Shirt from The Assembly Line
From the pattern description:
“The Puff shirt sewing pattern has overlap shoulders that create an elegant boatneck. The sleeves are wide at the bottom and gathered with elastic folded inwards which creates a puff sleeve. Even though the end result looks very refined and elegant, it’s really easy and fun to make. ”
Fabric Used:
“Plaid of My Dreams” black, white, and gray check rayon from Art Gallery
Did you make a muslin?
I did make a muslin, as I have never made any Assembly Line patterns and therefore couldn’t predict how this one would fit.
This blouse does have bust darts, and I did not have to make any changes to them, surprisingly! The puff shirt is designed to fit very loosely, so that is probably why I didn’t have to do my usual full bust adjustment.
Did you make any alterations to the pattern?
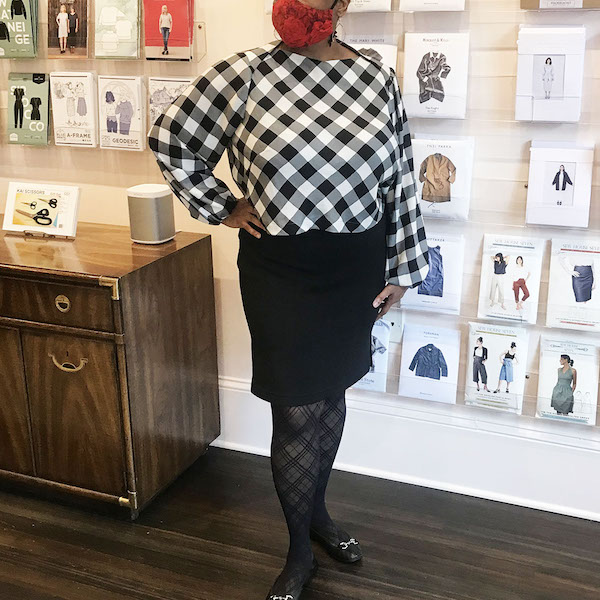
The first change I knew I needed to make was the length – I took off four inches. I’m short and short-waisted, and I knew I didn’t want to wear the blouse tucked in, so I wouldn’t need any extra length.
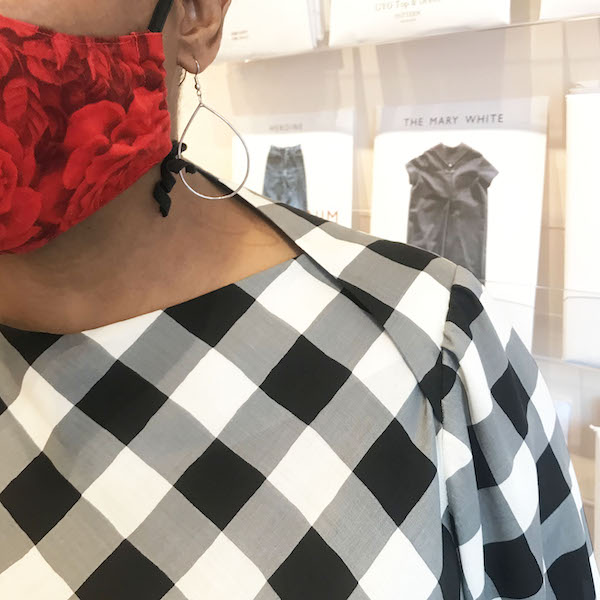
I also made the neck facings wider. This made the blouse sit very securely over my shoulders. The clever way the necklines overlap looked great on the muslin, but they slipped off my narrow shoulders too easily; making the facings larger weighed them down so that didn’t happen.
Did you learn any new techniques/skills?
The Puff Shirt is very straightforward so no new skills for me!
Do you have any tips for construction?
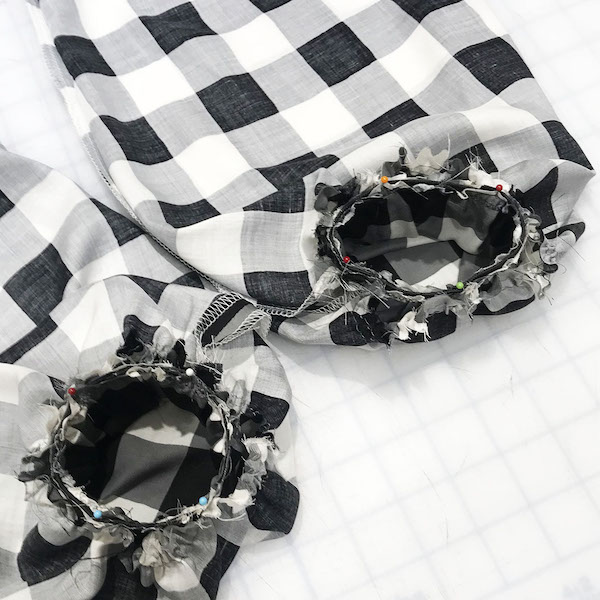
I thought the process for covering the wristband elastic with fabric was unnecessarily difficult. The pattern calls for stretching the elastic cuff to fit the larger fabric cuff, and then sewing them together with a straight stitch. I found this difficult to do with such a small ring of elastic, and not really necessary!
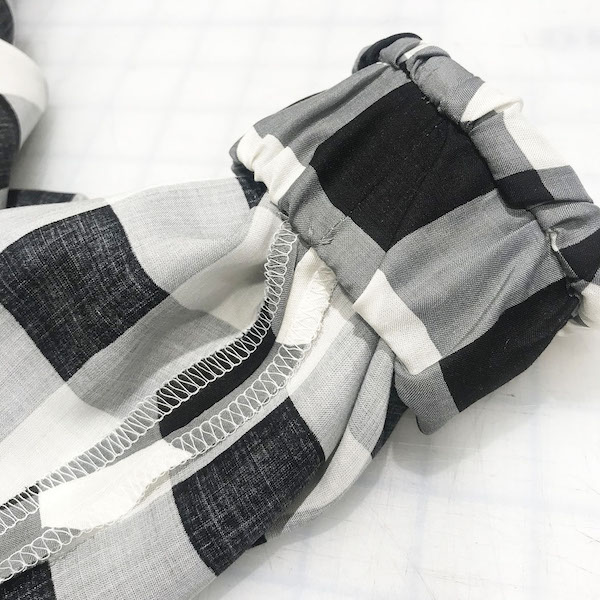
Since the cuff fit over my hand without much stretching, instead I gathered the fabric to match the elastic and sewed it with a zig zag stitch (so the cuff would still stretch a little bit – I never sew elastic with a straight stitch).
(In fact, if you plan to only wear the cuff tucked inside the sleeve, you wouldn’t have to cover the cuff with fabric at all, and could skip this step altogether.)
The pattern also calls for stitching the entire width of the cuff to the sleeve along the seam line, to keep it tucked inside. Instead, I did a few tacking stitches just at the inside seam and that worked fine.
The pattern calls for a very narrow hem, but I made mine about 1” wide, because I like the look of a deeper hem, and it seemed appropriate with the size of the check.
What did you like about the pattern/fabric?
This is a great pattern, because it is very simple to make but has an interesting and stylish silhouette; a lot of payoff for not a lot of work!
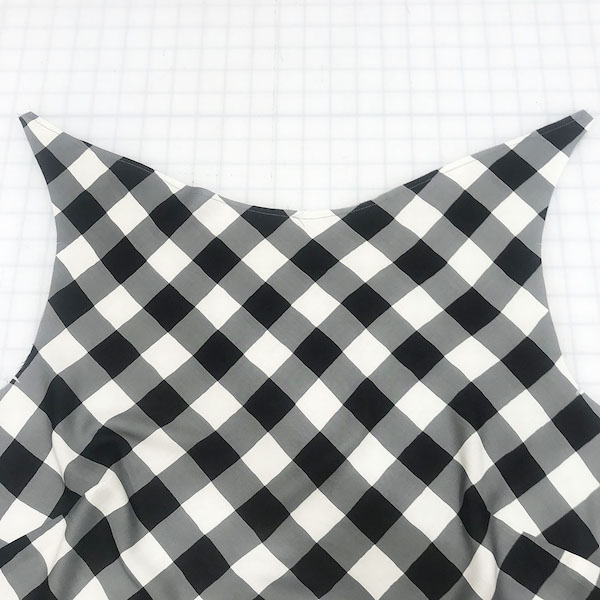
In order to take advantage of the large scale check of the fabric I chose, I cut the front on the bias and decided to take the time to make sure the print matched over the center back seam (confession: I very rarely bother matching patterns over seams!). Besides being fussy about those two things, this blouse came together very quickly!
The instructions include lots of construction tips for general sewing and very good diagrams, but can use slightly different terminology that what you might be used to.
What did you dislike about the pattern/fabric?
Outside of the cuff assembly, this blouse is a very easy make and I would definitely recommend it to a beginner.
The rayon is beautiful and wonderful to wear, and I love the look of the large scale check!
Would you make it again?
I would definitely make the puff shirt again, it would look amazing in a linen or linen blend (which would really show off the puff in the sleeve!), or a tencel twill for autumn or winter.
Stitch Samples is a blog series that gives you a closer look at the samples made by members of our shop gang.
