Maker: Mary
Pattern(s) Used:
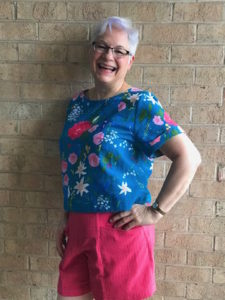
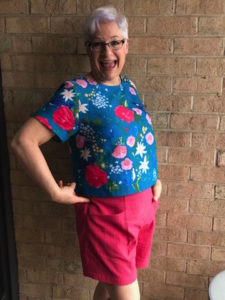
Pietra Pants/Shorts & Cielo Dress/Top from Closet Case Patterns. I made the shorts and the short sleeve top.
Fabric(s) Used:
The shorts are made in Mariner Cloth (colorway Salmon). The top is Nani Iro cotton double gauze (colorway Fuccura Blue).

Did you make a muslin?
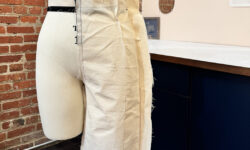
This is my third pair of Pietra shorts, and I have also made both the narrow and wide leg pants. I like this pattern! Its flattering with the flat front and pockets (yes, I said pockets!), high waist and elastic back for comfort. I did make a muslin with my first pair and I did make some fit changes which I will explain later.
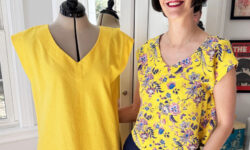
I have been hesitant to make the Cielo because it has a boxy look, which I am not usually a fan of. But sometimes we need to stretch our comfort zone, so I dove in. And my husband thinks it looks cute, so there may be others. Because this was my first time making this pattern, I made a muslin. I made some fit changes which make the pattern more flattering for my body.
I have learned, with a new pattern, always make a muslin! It saves time, believe it or not. There is nothing worse than spending hours and yards of beautiful fabric, and then discovering IT DOES NOT FIT! Sometimes I have been able to salvage the item, but often not. So, MAKE A MUSLIN!

I cut the upper front with the grain, everything else on the cross grain.
Did you make any alterations to the pattern?
All the alterations I made on these two patterns were for fit and comfort. I made no style changes on this go around.
Pietra Shorts: I found the pattern to be long in the crotch, so I shortened the crotch, front and back by 1”. Be aware that you will also have to change the notches to match the pockets. I didn’t shorten the pockets, but I did correct the notch placement. I also lengthened the legs by 2”. These are pretty short, and I wanted a little more coverage.
Cielo Top: I cut a size 10 shoulder and graded to a size 12 at the side seams. I still made a slight full bust adjustment and added about 1” more to the bust. I like to have some sort of dart because I find that, with a dart, the garment will fall straight down from the bust instead of winging out. I also rotated the dart down about 1” and lowered the point of the dart so it points to my actual bust. I then tried on the muslin again and decided to add ½” to the center front length and grade to nothing at the side seams so the front and back are equal length.

Full bust adjustment and new dart placement.
Do you have any tips for construction?
The Cielo top was pretty straight forward. I did use French seams through out because double gauze will tend to fray. I used my serger to sew on the cuffs – French seams would have been too bulky there. I bound the neckline with self bias tape.
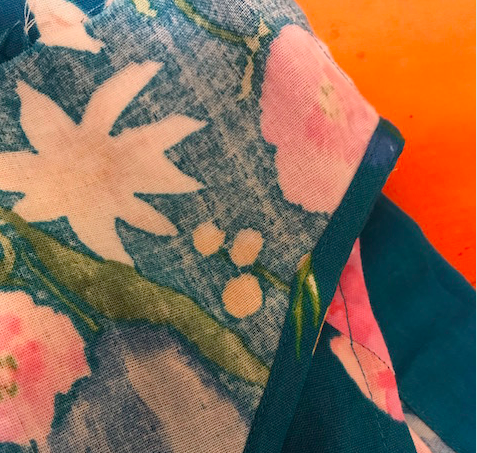
Having made the Pietra several times, I have sort of refined some of my techniques. First, I like to cut the facing out of a lightweight cotton. I also cut the waistband in half, added seam allowances to both cut sides and cut one out of the fashion fabric and one from the lightweight cotton. If the fabric is a little thick or heavy, this reduces bulk and helps it lay better at the waist. I also cut the upper side front piece to make a separate pocket piece, which I also cut from the lightweight cotton. (I know I make more work for myself, but I like it).
- Lining in a nice soft lightweight cotton.
The big thing I did differently with the Pietra shorts was the elastic insertion, so I’m sharing the changes I made to the construction that worked better for me:
(1) You only need enough elastic for ½ of your waist length.
(2) Stitch one side of the waistband as shown in the instructions. For the other side stitch only from the bottom of the waist band to the top of the front facing, leaving the rest of the waistband free.
(3) Then on the side that is completely stitched, sew ONE side of the elastic with the edge of the elastic butted against the seam stitching line of the waistband. (See first photo below – do not put the raw edge of the elastic to the raw edge of the seam). Zig-zag in place using a three step zig-zag stitch if you have one on your machine.
(4) Put a large pin on the loose end of the elastic, tuck it up against the top fold line of the waistband, folding down the lose end of the waistband over the elastic and extending the bottom of the waistband about 1/8” beyond the waist seam. Pin in place. Stitch the bottom of the waistband in place from the right side of the shorts, stitching in the ditch and making sure you catch the folded edge of the waistband. Leave the seam open at the side seam. Pull the elastic, using the pin, through the open seam. Pin elastic in place.
(5) Try them on and adjust the elastic so it is comfortable. Pin the elastic in place. Take off the shorts and sew the elastic in place. I stitch in the ditch through the front of the fabric. Make sure you catch the inside waistband in the seam. Trim elastic close to the seam. You will be able to see a little of the elastic, but I consider it worth it to have a pair of pants that fit comfortably at the waist.
(6) Continue as directed in the pattern and stitch the elastic with 3 rows. I lengthen my stitches here to a 3.0 or a 3.5. The stitching gives a more professional look to the back.
What did you like about the pattern/fabric?
I really like the Pietra Pants/Shorts. There definitely is another pair of long pants in the plans for spring, and maybe another pair of shorts. The Cielo Dress/Top is a new style for me, and like I said, my husband thinks it’s cute so I will probably make another in a soft drapey fabric.
I loved the fabric. I used a microtex needle for the mariner’s cloth because other sewists said a regular needle struggled through the stripes. I had no problem with the microtex needle. The Nani Iro double gauze was a dream to sew with. It didn’t really fray as much as I expected, washed beautifully and the color is scrumptious! What more could you want?
Stitch Samples is a blog series that gives you a closer look at the samples made by our staff.


